
Does this look happy to you?

In week 11, we learned about typography by using Adobe Illustrator. We were taught to create our own font by using width tool/twirl tool. We were require to create 2 own fonts. Above 2 are my fonts. Enjoy! :)
| WebLog for Visual Comm |
|
| Does this look happy to you? In week 11, we learned about typography by using Adobe Illustrator. We were taught to create our own font by using width tool/twirl tool. We were require to create 2 own fonts. Above 2 are my fonts. Enjoy! :)
0 Comments

3 different colour papers, scissors & tape 
In week 9 & 10, we learned a different thing from usual class, which is to fold a crane and by doing that, we will be covering 2 chapters in only 1 class! We were require to bring 3 different colour papers, scissor and tape to class. At first, I have no clue about what we are doing at all. Bit by bit, I really love the way how Ms. Ivy taught us. It's a very practical thing and by using this method, it makes us so easy to understand everything!
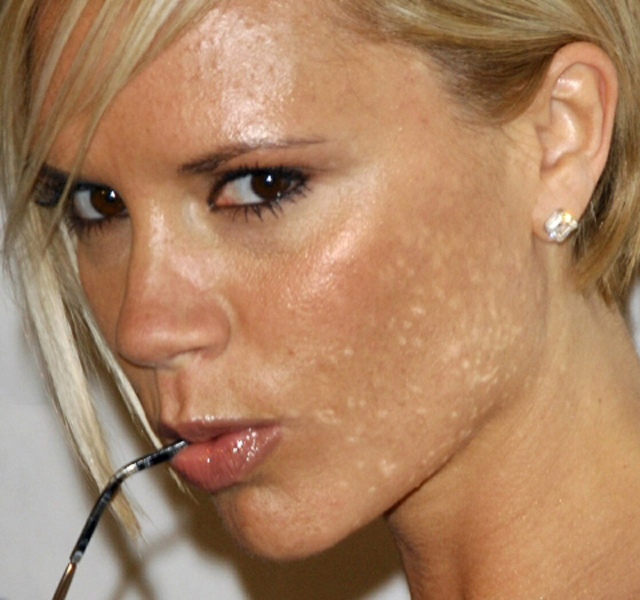
First, we were ask to fold a crane by referring to a website (for those who doesn't know how to fold a crane). Next is to fold a base to insert our crane. We were ask to write down a few words.There's "Position" and "Orientation" on the top left of the base. So, when you fold that particular part, there will be a "V" point which meansa vanish point is same as perspective. It formulates "Detail", "Linear" and "Ariel". "Time" and "Illusions" are on the lower left. Illusions means 2D and 3D creates illusions with motion movement. Next, "Light/Brightness" and "Monocular Cues" are on the top right of the base. Light/Brightness means that colour is the same as value and those can be texture gradient. Whereas Monocular Cues is depth cue which results only using ONE way - linear. At last, there's "Binocular Cues" and "Motion" on the lower right. Binocular cues means depth cue which results of BOTH way seeing with both eyes to perceive parallax. All the above that I have mentioned is a 2D and 3D visual perceptions that Ms. Ivy have taught us in the class. It is really helpful for us to remember everything now Hello readers, in week 8, we were require to do complete a quiz within a few days. Which is to beautify a women's face by using Adobe Photoshop. Ms. Ivy wants us to apply every skills that we have learned throughout these few weeks. The original picture was given by Ms. Ivy and the first thing I did is to use clone tool to smoothen the face texture. Next is to draw eyeliner on the eyes. What I use was a pencil tool in black colour and reduce the opacity to 35% and zoom in to the eyes to draw a thin eyeliner. After that, I put on the blusher by using brush tool in orange/pink colour with very low capacity to make it look natural. The last thing I did is to search for 'eye shadow's colour' in google. And I found something silver-ish colour to make it as the eye shadow. Taaa-daaa! There you go!
In week 6 & 7, we have learned how to edit the colour of a gangnum by using pen tool in Adobe Illustrator. It was really tiring to complete this task. This was our Assignment 3, therefore I really spent a lot of time and effort doing it. Kept changing colour to make it look perfect. It was not easy at all, I have to edit every single part. The hardest was the head because it is too detail. Overall, I am quite happy with the output as shown below. Because I know I have did my best. So, there you go, My tracing!
|


 RSS Feed